3. Instantiation types
Choose the option that best fits your needs! 🚀
The Dynatrace Enablement Framework supports multiple ways to instantiate your development environment. You can run it in Github Codespaces, VS Code Dev Containers or local containers, in AMD or ARM architectures.
🏃🏻♂️ Quick Step by Step guide: Instantiating Your Environment#
1. Running in GitHub Codespaces  #
#
- Go to the repository hosted on GitHub.
- Click the <> Code button.
- Create a new Codespace using the main branch, or click + New to customize how and where to run the Codespace within GitHub Cloud.
Repository secrets such as DT_ENVIRONMENT, DT_OPERATOR_TOKEN, and DT_INGEST_TOKEN (among others) are injected automatically using GitHub Codespaces secrets. No manual setup is required—these are available as environment variables inside the container.
2. 📦 Running in VS Code Dev Containers or Local Container#
Key Difference: VS Code Dev Container vs Local Container
The main difference between a VS Code Dev Container and a local container is how each environment is created and managed. A VS Code Dev Container is launched and orchestrated by VS Code using the configuration in devcontainer.json. A local container is started independently using the Makefile and runlocal script, allowing you to build and manage the container from the terminal without relying on VS Code. This is ideal for headless or automated workflows.
The following steps apply to both scenarios:
-
Provision the infrastructure
🏗️ Setting up the Infrastructure
You may provision your infrastructure on any major cloud provider or run locally using Multipass.
Minimum requirements for a cloud or local machine:
- Operating System: Ubuntu LTS (22.04 or 24.04 recommended)
- CPU & Memory: Requirements depend on your workloads. As a guideline, refer to the
hostRequirementssection in.devcontainer.json. A typical setup with 4 CPU cores and 16 GB RAM is sufficient for most use cases. - Network Ports: Ensure the following ports are open for inbound connections:
22(SSH)80— nginx ingress HTTP; all apps exposed via nginx ingress + sslip.io magic DNS (e.g.http://todoapp.<your-ip>.sslip.io)443— nginx ingress HTTPS (optional; required for TLS-terminated routes)
-
SSH into the host
-
Clone the repository
-
Set up secrets and environment variables
- Define all required secrets as environment variables. For both VS Code Dev Containers and local containers, create a
.envfile under.devcontainer/runlocal/.env. - The secrets required are defined in the
secretssection of.devcontainer.json. If no secrets are needed, create an empty.envfile.
Sample
.envfileYou can copy and paste the following sample into
.devcontainer/runlocal/.env. Ensure all required secrets for the training are included. - Define all required secrets as environment variables. For both VS Code Dev Containers and local containers, create a
-
Verify prerequisites
- Ensure
makeanddockerare installed on the host and the user has access to Docker.
- Ensure

Ready to Launch
You are all set! Launch the enablement with VS Code as a dev container or with make as a plain Docker container.
2. a. 📦 🖥️ Running as dev container with VS Code#
- Let's tell VS Code to read the secrets as environment variables from an
.envfile. Modify therunArgsin.devcontainer/devcontainer.jsonand add"--env-file", ".devcontainer/runlocal/.env"like the following: - This ensures all variables in
.devcontainer/runlocal/.envare available inside the container. 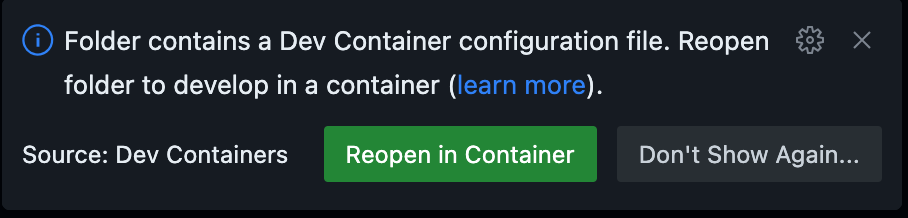 Open the folder in VS Code and use the Dev Containers extension to "Reopen in Container". VS Code will use the
 .devcontainer/devcontainer.jsondefinition to build and start the environment for you.- You can rebuild the container at any time by typing
[CTRL] + Shift P > Dev Containers: Rebuild and reopen in container
2. b. 📦 🐳 Running as local container with make#
- Navigate to
.devcontainerfolder and run: -
This will build and launch the container. All ports, volumes, and environment variables are set up automatically.
Protip: create a new Terminal
For attaching a new Terminal to the container, just type
make start. -
Secrets and environment variables are loaded from
.devcontainer/runlocal/.env. - The
makefile.shscript passes the variables to Docker at runtime such as arguments, volume mounts and port-forwarding. The devcontainer.json file is not used with this set-up.
Instantiation Types#
1. ☁️ GitHub Codespaces#
- One-click cloud dev environments
- No local setup required—just click
- Learn more about Codespaces
![]()
Accessing apps in Codespaces#
Port 80 is forwarded automatically from the container. Once post-create.sh finishes, open the forwarded port in the Ports panel or use the URL shown in the terminal:
The nginx ingress has a catch-all rule (no Host restriction) that routes all unmatched traffic to the primary app deployed in that Codespace. Multi-app repos register apps in order; the last one registered owns the catch-all. Secondary apps are still reachable via their sslip.io URL (e.g. http://bugzapper.127.0.0.1.sslip.io).
Why 127.0.0.1 in sslip.io URLs inside Codespaces
detectIP() returns 127.0.0.1 inside a Codespace. The sslip.io hostname todoapp.127.0.0.1.sslip.io resolves to 127.0.0.1 (the container's loopback), so the sslip.io Host-header rule also works inside the Codespace terminal.
2. 🖥️ VS Code Dev Containers#
- Use the Dev Containers extension for a seamless local experience in VS Code
- All configuration is in
.devcontainer/devcontainer.json - Supports secrets, port forwarding, and post-create hooks
- Apps are accessible at
http://<app>.<your-ip>.sslip.io(port 80 forwarded)
3. 🐳 Local Container#
- Run the same environment on your machine using Docker.
- Easiest way: just run
make startin the.devcontainerfolder. - This will build and launch the container if needed, or attach to it if already running.
- All ports, volumes, and environment variables are set up for you automatically.
- Apps are accessible at
http://<app>.<your-ip>.sslip.io— the host's port 80 routes to the nginx ingress inside the container.
4. 🛰️ Orbital (Sysbox / Training delivery)#
Orbital is the Dynatrace WWSE self-service training platform. Each job runs inside a
Sysbox container (Docker-in-Docker without
--privileged) on an EC2 worker. Orbital is the only instantiation type that uses
wildcard subdomains instead of port forwarding.
How apps are exposed in Orbital#
Every app gets a dedicated HTTPS URL derived from the job ID:
job_slug is derived from the job ID with the verbose worker prefix shortened:
- Worker jobs:
worker-x86_64-34ea2d-...→34ea2d-...(6-char hex replacesworker-{arch}-) - Master jobs:
master-...stays as-is
The result is then lower-cased, non-[a-z0-9-] characters stripped, and truncated so the
full DNS label ({appname}--{slug}) stays within the 63-character limit.
Examples:
# AMD worker job
https://astroshop--34ea2d-codespaces-framework-1779883231-abc123.autonomous-enablements.whydevslovedynatrace.com

# Master job
https://astroshop--master-codespaces-framework-1779883231-abc123.autonomous-enablements.whydevslovedynatrace.com
How routing works#
Works with both k3d and kind cluster engines — the outer proxy layer is
engine-agnostic; only the inner nginx ingress provider differs (cloud for k3d,
kind for kind).
Browser → nginx (wildcard TLS block)
         → FastAPI /proxy-subdomain/{path}
         → _find_job_by_subdomain() [Redis lookup via normalized prefix scan]
         → http://{worker_ip}:{app_proxy_port}/{path}
              Host: {app}.{worker_ip}.sslip.io   ← nginx ingress routes on this
         → nginx ingress → Envoy / service
Key points:
- No HTML/CSS rewriting. Every app is served at root
/so Next.js, SPAs, and static asset resolvers all work withoutbasePathhacks. - The nginx ingress always uses the sslip.io host internally. The public wildcard URL
is a separate nginx front-end that sets the
Hostheader for the ingress. app_proxy_portis a fixed host port (32000–32005) published by the Sysbox container and stored in Redis on job start.
Environment signals#
| Variable | Value | Set by |
|---|---|---|
ORBITAL_ENVIRONMENT |
true |
executor.py (injected into all Orbital container jobs) |
ORBITAL_JOB_ID |
<job_id> |
executor.py (daemon/integration-test; used to compute subdomain slug) |
INSTANTIATION_TYPE |
orbital |
variables.sh (reads ORBITAL_ENVIRONMENT) |
detectRunEnvironment() returns "orbital" when ORBITAL_ENVIRONMENT=true, which
getAppURL() and registerApp() use to build the wildcard subdomain URL instead of
the sslip.io or Codespaces URL.
5. 🧑🚀 Codespaces launched from the Enablement App (planned)#
The Enablement App lets a learner launch a training from inside their Dynatrace tenant. Today that always provisions an Orbital Sysbox job. A planned admin toggle lets the operator switch the launch backend to a GitHub Codespace running in the learner's own GitHub account — the learner picks a machine, GitHub spins it up and bills it, and Orbital is repurposed as a relay that forwards the terminal, logs, and app URL back into the app player.
This is still the Codespaces instantiation type at runtime (INSTANTIATION_TYPE=github-codespaces)
— the framework, repo, and post-create.sh are identical to opening a Codespace by hand. What is new
is who pressed start (the app, via the user's GitHub identity) and who relays the session (Orbital).
How it works (per-user OAuth, not a shared token)
The app mints the DT tokens and runs a GitHub OAuth service (codespace scope). With the
user's token, Orbital sets the user's Codespaces secrets, calls
POST /repos/{owner}/{repo}/codespaces as the user (so the Codespace is owned + billed to
them). The terminal is relayed into the app via an Orbital PTY bridge over gh codespace ssh;
gh codespace logs (logs) and ports visibility 80:public (app URL) use the same access. The
stock image ships no sshd, but an sshd() function installs openssh-server on demand from
post-create — proven 2026-06-18 (no devcontainer feature needed); it will move into the cached
framework functions.sh so every repo gets it. A shared bot PAT cannot do the create — it has no
on-behalf-of, even for a public repo — so the design is per-user.
DT creds must be user-scope Codespaces secrets (repo/org secrets break per-tenant isolation).
Full design: dynatrace-app-enablements/docs/CODESPACES_DIRECT_LAUNCH_ANALYSIS.md.
DNS & TLS requirements
The wildcard subdomain requires:
- DNS:
*.autonomous-enablements.whydevslovedynatrace.com A 18.134.158.252(Google Cloud DNS) - TLS: a Let's Encrypt wildcard cert for
*.autonomous-enablements.whydevslovedynatrace.comissued via DNS-01 challenge (manual renewal every 90 days) - nginx:
server_names_hash_bucket_size 128in/etc/nginx/nginx.conf
⚡ Quick Comparison#
| Type | Runs On | VS Code Needed | Fast Start | Customizable | Secrets Handling | Port Forwarding | Best For |
|---|---|---|---|---|---|---|---|
| ☁️ Codespaces | GitHub Cloud | ❌ | ✅ | ❌ | Auto-injected | Auto | Quick onboarding, demos |
| 🖥️ VS Code DevContainer | Provided Infrastructure | ✅ | ✅ | ✅ | Auto/manual | Auto | Full-featured local dev |
| 🐳 Local Container | Provided Infrastructure | ❌ | ✅ | ✅ | Manual/.env |
Manual/Makefile | Reproducible local dev |
| 🛰️ Orbital | EC2 Sysbox Workers | ❌ | ✅ | ❌ | Auto-injected | Wildcard subdomain | Training delivery |
🔐 Secrets & Environment#
Secrets and environment variables are handled differently depending on the instantiation type:
| Instantiation Type | How Secrets Are Provided | Where to Configure/Set | Notes |
|---|---|---|---|
| ☁️ Codespaces | Auto-injected as environment variables from GitHub Codespaces secrets | GitHub repository > Codespaces secrets | No manual setup; secrets available at container start |
| 🖥️ VS Code Dev Containers | Passed as environment variables via runArgs and .env file |
.devcontainer/devcontainer.json, .devcontainer/runlocal/.env |
Edit/add .devcontainer/runlocal/.env for local secrets; runArgs must include --env-file |
| 🐳 Local Container | Loaded from .devcontainer/runlocal/.env file and passed to Docker at runtime by makefile.sh |
.devcontainer/runlocal/.env, makefile.sh |
Run make start in .devcontainer; secrets loaded at container start |
| 🛰️ Orbital | Written just-in-time per job as .devcontainer/.env by the worker (executor.py); minted, tenant-scoped, fail-closed for foreign tenants |
Orbital ops-server (no learner action) | See Orbital; CoE creds never leak cross-tenant |
| 🧑🚀 App-launched Codespace | The learner's user-scope GitHub Codespaces secrets (set once, or via per-user OAuth) — repo/org secrets break per-tenant isolation | https://github.com/settings/codespaces or app OAuth |
See Enablement App; create API takes no env, so secrets are pre-set |
🏠 Running locally#
Using Multipass for Local Development#
Multipass is a lightweight VM manager from Canonical that makes it easy to launch and manage Ubuntu virtual machines on macOS, Windows, and Linux. This is especially useful if you want to run the framework in a clean, reproducible Ubuntu environment without dual-booting or using a full desktop VM.
Why use Multipass?
- Ensures compatibility with Ubuntu-based dev containers and scripts
- Isolates your development environment from your host OS
- Quick to launch, easy to reset or remove
Basic usage#
- Install Multipass (instructions)
- Launch an Ubuntu VM:
Mounting Volumes on Multipass
You can mount folders from your host into the VM using multipass mount if you want to edit code locally but run containers in the VM. For example in the following example we are creating a VM mounting the folder enablement where you have all repositories of the enablement framework you want to use.